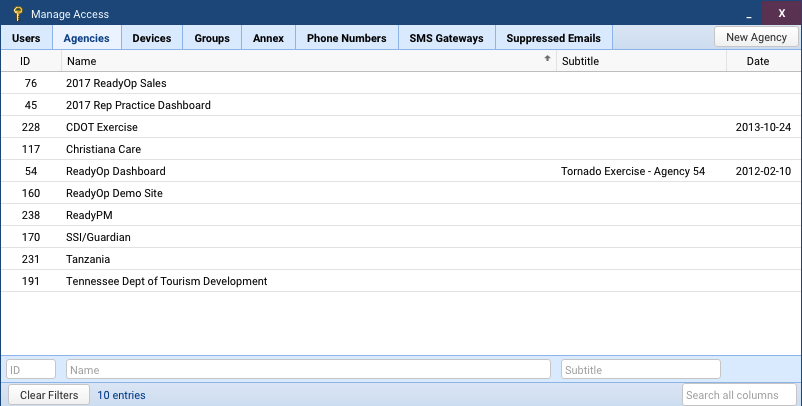
The Access section provides the capability to manage most configuration information for your agency. Depending on your permission level, Access facilitates managing the Annex, Devices, Groups, Users, SMS Numbers, SMS Gateways and Suppressed Emails.
Users
A user is someone that is allowed to access the ReadyOp platform using a Username and Password. Users are assigned permissions on a per agency basis from within the ReadyOp dashboard system. Users differ from Contacts in that a contact is someone who can be contacted through the ReadyOp system, but may not have access to login and access the system itself. A contact may not even be aware of the ReadyOp system, how it works, or that it even exists.
Creating a User
Users who have been granted permission to create users will be allowed to create other users.
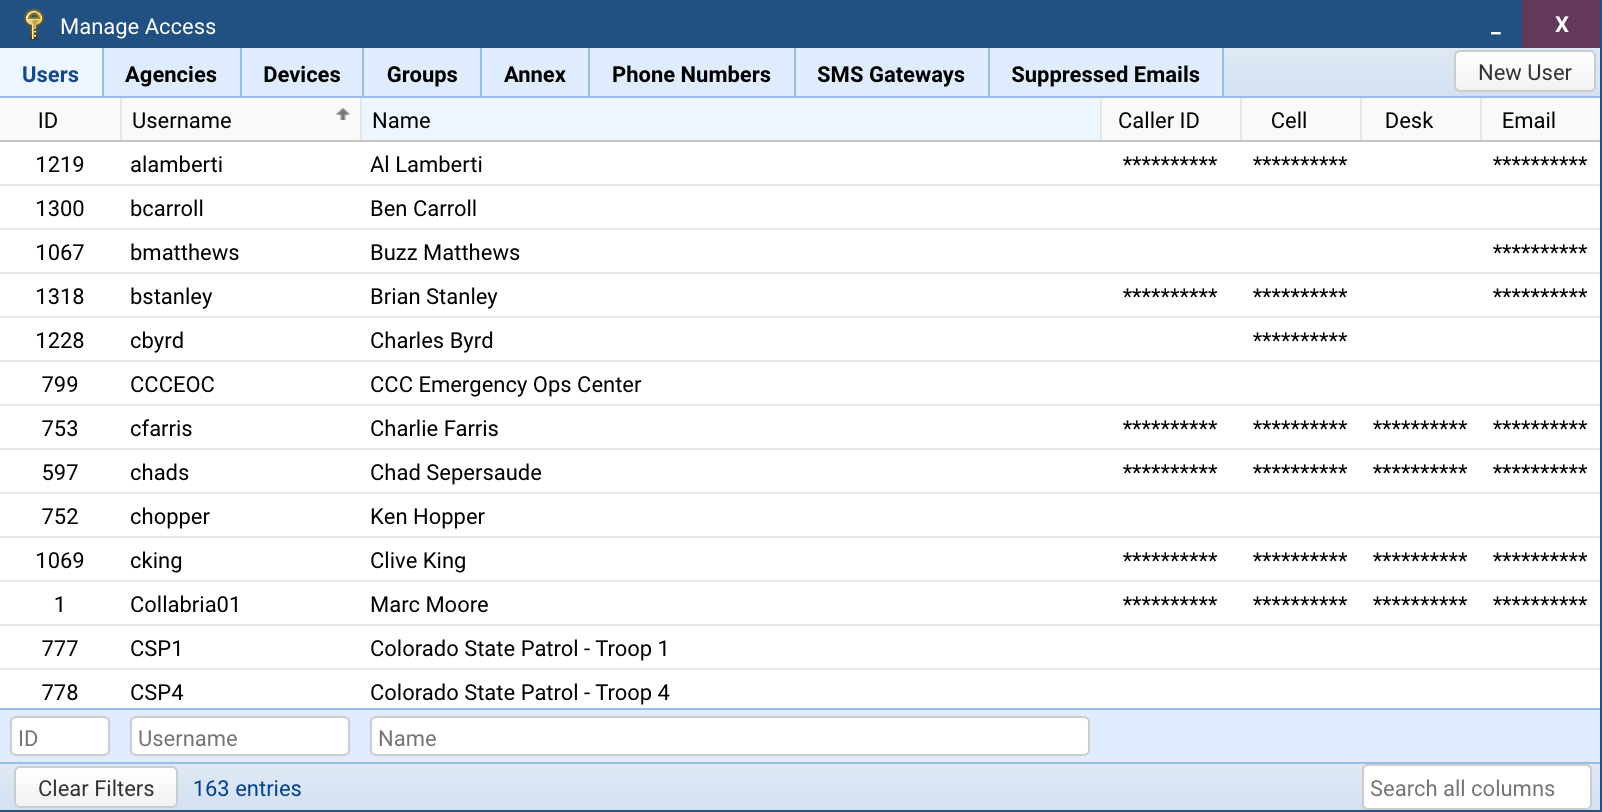
- Start by clicking the “Menu” button followed by “Access” in the top-right of the ReadyOp dashboard.
- Inside the Manage Access dialog, select the “Users” tab.
- This tab may not be present if you have not been granted access to manage users.
- Continue by clicking the “New User” button in the upper right corner of the dialog.
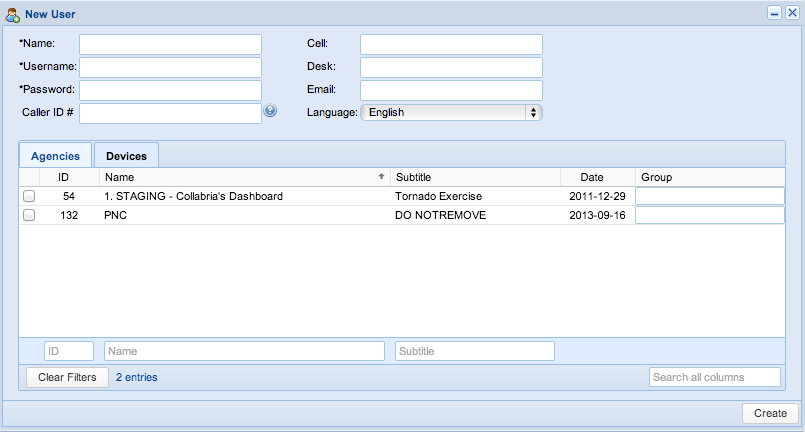
- In the “New User” dialog, fill out the relevant information for the new user you’re creating.
- Name
- Should be the user’s full name, i.e. John Doe.
- Username
- Used for authenticating. It must be at least 3 characters in length and cannot contain special characters.
- Password
- Used for authentication. The user will be able to modify this once they login.
- Caller ID #
- The Caller ID # is the phone number that recipients will see on their phone when receiving a phone call made by this user through the ReadyOp system. i.e. If the Caller ID # were +18132897620, when this user makes a phone call, the receiving person would see the incoming call as coming from +18132897620.
- Cell
- The cell phone this user will be able to use when placing calls. This is not the same as the number which may be associated to the user for reaching them. When this user places a call they’ll be prompted how they (the user) would like to be connected, if a cell phone is provided here, it will be listed as an option.
- Desk
- The desk phone this user will be able to use when placing calls. This is not the same as the number which may be associated to the user for reaching them. When this user places a call they’ll be prompted how they (the user) would like to be connected, if a desk phone is provided here, it will be listed as an option.
- Language
- The user interface language for the user. Currently available options include English and Spanish.
- Name
- In the Agencies tab, you’ll need to select (using the available checkboxes) the Agencies in which this user will be able to login. When selecting an agency, you’ll also need to type in the provided Group box, which user group this user will be placed into. Groups are used to designate the user permissions this user will be assigned in that agency.
- A group is required on a per agency basis.
- Every user must be assigned access to at least one agency.
- In the devices tab, you’ll be able to select (using the available checkboxes) which Devices (iPad, iPhone, Android, etc) this user is permitted to access the system through. You do not need to specify any devices to allow a user to connect using a web browser, as this is enabled by default.
- When finished, press “Create” to save your new user.
Deleting a User
Users who have been granted permission to delete users will be allowed to delete other users.
- Start by clicking the “Menu” button followed by “Access” in the top-right of the ReadyOp dashboard.
- Inside the Manage Access dialog, select the “Users” tab.
- This tab may not be present if you have not been granted access to manage users.
- Continue by double clicking on the user you’d like to delete.
- Inside the “Modify User” dialog, click the “Delete” in the bottom left corner. You cannot delete a user who is also assigned to agencies in which you do not have permission to access.
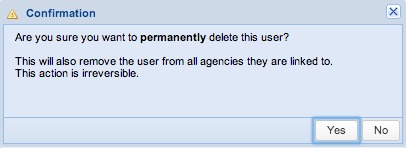
- You’ll be prompted with a warning notifying you that deleting a user is a permanent action, are you sure you’d like to continue.
- To delete the user, press “Yes”, to cancel press “No”.
Modifying a User
Users who have been granted permission to modify users will be allowed to modify other users.
- Start by clicking the “Menu” button followed by “Access” in the top-right of the ReadyOp dashboard.
- Inside the Manage Access dialog, select the “Users” tab.
- This tab may not be present if you have not been granted access to manage users.
- Continue by double clicking on the user you’d like to modify.
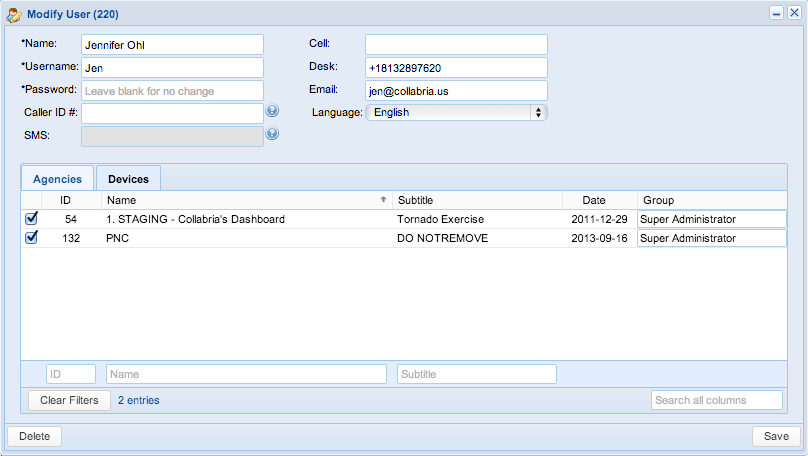
- In the “Modify User” dialog, fill out the relevant information for the user you’re modifying.
- Name
- Should be the user’s full name, i.e. John Doe.
- Username
- Used for authenticating. It must be at least 3 characters in length and cannot contain special characters.
- Password
- Used for authentication. The user will be able to modify this once they login.
- Caller ID #
- The Caller ID # is the phone number that recipients will see on their phone when receiving a phone call made by this user through the ReadyOp system. i.e. If the Caller ID # were +18132897620, when this user makes a phone call, the receiving person would see the incoming call as coming from +18132897620.
- Cell
- The cell phone this user will be able to use when placing calls. This is not the same as the number which may be associated to the user for reaching them. When this user places a call they’ll be prompted how they (the user) would like to be connected, if a cell phone is provided here, it will be listed as an option.
- Desk
- The desk phone this user will be able to use when placing calls. This is not the same as the number which may be associated to the user for reaching them. When this user places a call they’ll be prompted how they (the user) would like to be connected, if a desk phone is provided here, it will be listed as an option.
- Language
- The user interface language for the user. Currently available options include English and Spanish.
- SMS
- In order for this user to be able to receive responses to SMS messages they send using the ReadyOp dashboard, they will need to be assigned a unique phone number for SMS. SMS Numbers can be assigned by the ReadyOp Super Administrator. For more information on assigning an SMS number, contact ReadyOp customer support.
- A user does not need a unique SMS Number assigned to send messages. By default all users are able to send SMS using the ReadyOp dashboard. This is only required for the user to receive responses through the ReadyOp system.
- An SMS Number is assigned on a per-user basis, and does not correlate to Contacts (recipients of the messages). This means that only the user needs to have an SMS number assigned to them, not each individual contact this user may be contacting.
- Name
- In the Agencies tab, you can select or de-select (using the available checkboxes) the Agencies in which this user will be able to login. When selecting an agency, you’ll also need to type in the provided Group box, which user group this user will be placed into. Groups are used to designate the user permissions this user will be assigned in that agency.
- A group is required on a per agency basis.
- Every user must be assigned access to at least one agency.
- In the devices tab, you’ll be able to select or de-select (using the available checkboxes) which Devices (iPad, iPhone, Android, etc) this user is permitted to access the system through. You do not need to specify any devices to allow a user to connect using a web browser, as this is enabled by default.
- When finished, press “Save” to save your changes to the user’s profile.
Agencies
In ReadyOp an agency is used to segregate Contacts, Tabs, Objects, Roles, Teams, News, History, etc, within a given ReadyOp domain into separate Sites. Inside a ReadyOp domain (i.e. domain.readyop.com) there can be many different Agencies. Each agencies information is separate, and users are assigned permissions on a per agency basis. It is possible to have “User A” who has access to agencies 1 & 3 as a “Standard User”, and access to agency 2 as an “Administrator”. While “User B” only has access to Agency 2 as an Administrator. To create new agencies, or modify existing agencies within your ReadyOp domain, please contact ReadyOp customer support for more information.
Devices
There are several different methods for accessing parts of the ReadyOp platform. While the primary method would be a standard laptop or desktop computer, users also have the ability to access the system using other devices such as Android phones and tablets, as well as iPhones and iPads. Although removing the ability to connect via a standard laptop or desktop computer is not possible, this section provides the ability to permit or remove access to the ReadyOp system on a per device, per user basis.
Creating a Device
Only users who have been assigned the administrative permission to manage devices will be able to create and/or assign new device.
- Start by clicking the “Menu” button followed by “Access” in the top-right of the ReadyOp dashboard.
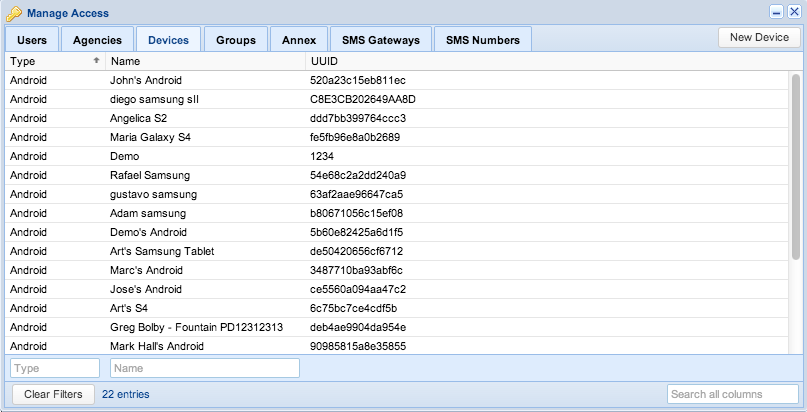
- Inside the Manage Access dialog, select the “Devices” tab.
- This tab may not be present if you have not been granted access to manage devices.
- Continue by clicking the “New Device” button in the upper right corner of the dialog.
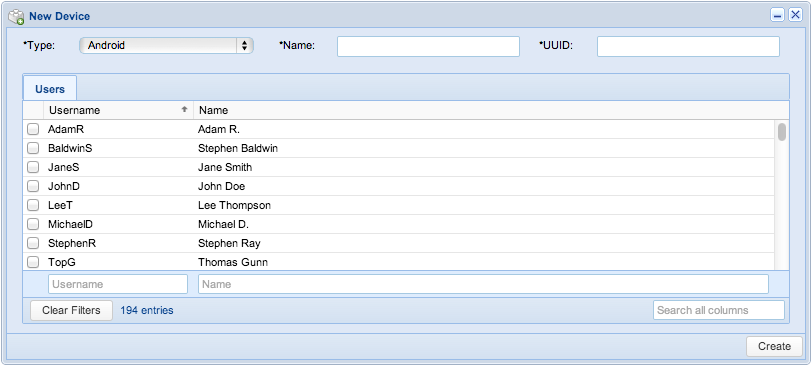
- In the “New Device” dialog, fill out the relevant device information.
- Type
- The type of device, currently options include Android, iPhone and iPad.
- Name
- A friendly name used to identify the device. This can be used to make device management easier for you as an administrator.
- UUID
- The UUID (Universally Unique Identifier) can be obtained from the device itself, after launching the ReadyOp application, it’s located at the very bottom of the “Settings” page.
- This ID is automatically generated when the application is installed on the device, and will change if the application is ever removed and re-installed. It will remain the same through application updates.
- Type
-
In the “Users” tab, you’ll need to select which specific users have access to login to this device.
- This means that if you only granted access to the user “John Doe”, no user other than “John Doe” could login using that specific device.
- When finished, press the “Create” button to create the new device.
Deleting a Device
Only users who have been assigned the administrative permission to manage devices will be able to delete devices.
- Start by clicking the “Menu” button followed by “Access” in the top-right of the ReadyOp dashboard.
- Inside the Manage Access dialog, select the “Devices” tab.
- This tab may not be present if you have not been granted access to manage devices.
- Continue by double clicking the device you’d like to delete.
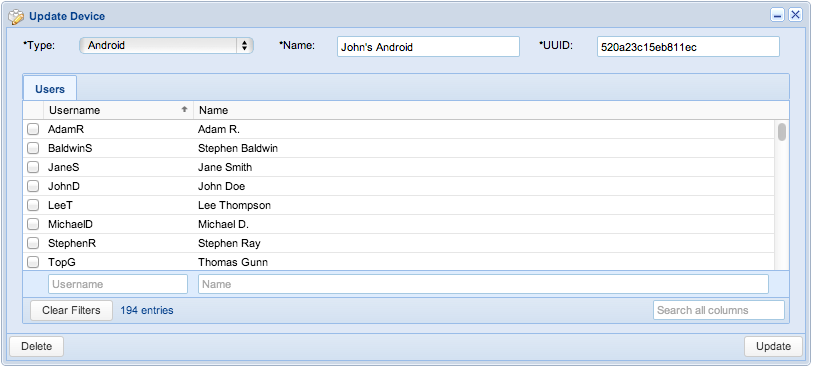
- Inside the “Update Device” dialog, click the “Delete” in the bottom left corner.
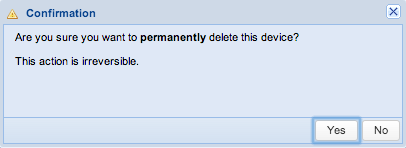
- You’ll be prompted with a warning notifying you that deleting the device is a permanent action, are you sure you’d like to continue.
- To delete the device, press “Yes”, to cancel press “No”.
Modifying a Device
Only users who have been assigned the administrative permission to manage devices will be able to modify and/or assign devices.
- Start by clicking the “Menu” button followed by “Access” in the top-right of the ReadyOp dashboard.
- Inside the Manage Access dialog, select the “Devices” tab.
- This tab may not be present if you have not been granted access to manage devices.
- Continue by double clicking the device you’d like to modify.
- In the “Modify Device” dialog, fill out the relevant device information.
- Type
- The type of device, currently options include Android, iPhone and iPad.
- Name
- A friendly name used to identify the device. This can be used to make device management easier for you as an administrator.
- UUID
- The UUID (Universally Unique Identifier) can be obtained from the device itself, after launching the ReadyOp application, it’s located at the very bottom of the “Settings” page.
- This ID is automatically generated when the application is installed on the device, and will change if the application is ever removed and re-installed. It will remain the same through application updates.
- Type
-
In the “Users” tab, you’ll need to select which specific users have access to login to this device.
- This means that if you only granted access to the user “John Doe”, no user other than “John Doe” could login using that specific device.
- When finished, press the “Update” button to save the devices updated information.
Groups
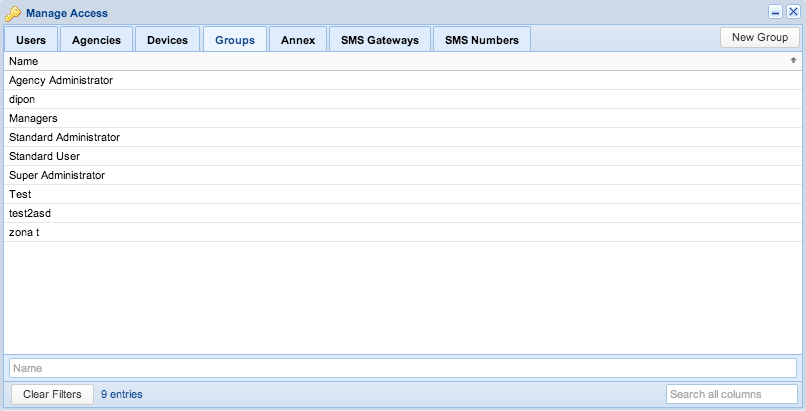
In ReadyOp groups provide a way of assigning permissions to a subset of users, or even a single user. Each ReadyOp installation comes with the following default groups; Super Administrator, Agency Administrator, Administrator, and Standard User. These 4 default groups are available in every agency and cannot be modified or deleted. Every user within the ReadyOp platform must be assigned to a single user group. Outside of the 4 default groups, new groups can be created with a specified set of permissions, enabling an administrator to setup fine grained access control lists. Groups are assigned a set of permissions, as well as which tabs the users in that group will be able to access, and groups are linked to agencies in which they are relevant.
Creating a Group
Users who have been granted permission to create groups will be allowed to create new groups for agencies and users in which they have access. It is not possible for an administrator to create or manage a group in an agency they do not have access in themselves.
- Start by clicking the “Menu” button followed by “Access” in the top-right of the ReadyOp dashboard.
- Inside the “Manage Access” dialog, select the “Groups” tab.
- This tab may not be present if you have not been granted access to manage groups.
- Continue by clicking the “New Group” button in the upper right corner of the Manage Access dialog.
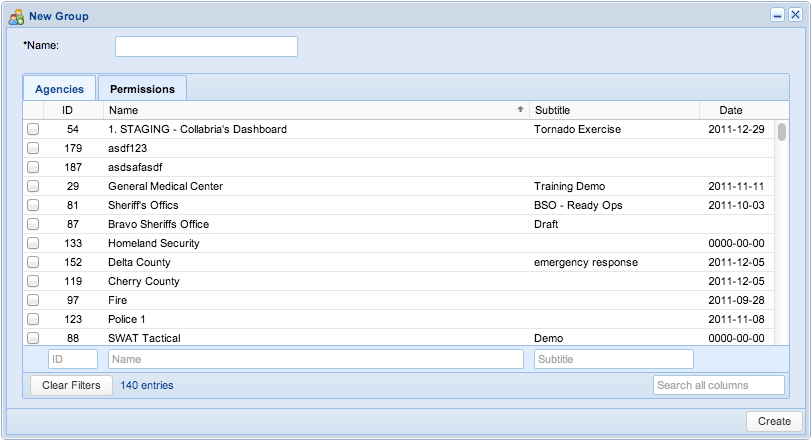
- A New Group dialog will appear. Enter the name for which you’d like to identify this new group.
- Inside the new group dialog in the “Agencies” tab, select (using the available checkboxes) which agencies this group will be available in.
- When selecting each agency, you’ll be prompted with a “Select Tabs” dialog allowing you to specify which tabs inside that particular agency the user will have access to.
- This allows you to further restrict access by providing a subset of users inside this group access only to specified tabs or sections of information.
- Tabs that do not have a marked checkbox will not be visible for users in the group.
- When creating a new user and assigning them to an agency, only groups assigned to that agency will be available.
- i.e. Creating a group and selecting only agencies 54 and 160, would not allow you to assign it to a user in any other agencies.
- When selecting each agency, you’ll be prompted with a “Select Tabs” dialog allowing you to specify which tabs inside that particular agency the user will have access to.
- In the “Permissions” tab, select (using the available checkboxes) which permissions users assigned to this group will be given.
- It is not possible to assign permissions to a group if your user profile does not have that permission. i.e. If you are a member of the “Agency Administrator” group, you do not have permission to “Create Agencies”; therefore, you wouldn’t be able to give someone else permission to do so.
- When you are finished configuring your new group press “Create” to save the new group.
Deleting a Group
Users who have been granted permission to delete groups will be allowed to delete existing groups for agencies and users in which they have access. It is not possible for an administrator to delete a group in an agency they do not have access in themselves.
- Start by clicking the “Menu” button followed by “Access” in the top-right of the ReadyOp dashboard.
- Inside the “Manage Access” dialog, select the “Groups” tab.
- This tab may not be present if you have not been granted access to delete groups.
- Continue by double clicking on the group you’d like to delete.
- It is not possible to delete any of the 4 default groups (Super Administrator, Agency Administrator, Administrator, Standard User).
- Inside the “Modify Group” dialog, click the “Delete” in the bottom left corner.
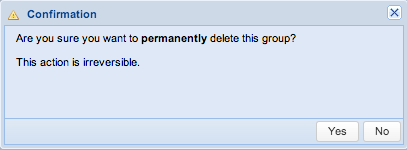
- You’ll be prompted with a warning notifying you that deleting a group is a permanent action, are you sure you’d like to continue.
- To delete the group, press “Yes”, to cancel press “No”.
Modifying a Group
Users who have been granted permission to modify groups will be allowed to modify existing groups for agencies and users in which they have access. It is not possible for an administrator to create or manage a group in an agency they do not have access in themselves.
- Start by clicking the “Menu” button followed by “Access” in the top-right corner of the ReadyOp dashboard.
- Inside the “Manage Access” dialog, select the “Groups” tab.
- This tab may not be present if you have not been granted access to manage groups.
- Continue by double clicking the group you’d like to modify.
- It is not possible to modify any of the 4 default groups (Super Administrator, Agency Administrator, Administrator, Standard User).
- The Name box allows you to change the name of the group.
- Inside the new Manage access dialog in the “Agencies” tab, select (using the available checkboxes) which agencies this group will be available in.
- When selecting each agency, you’ll be prompted with a “Select Tabs” dialog allowing you to specify which tabs inside that particular agency the user will have access to.
- This allows you to further restrict access by providing a subset of users inside this group access only to specified tabs or sections of information.
- Tabs that do not have a marked checkbox will not be visible for users in the group.
- When creating a new user and assigning them to an agency, only groups assigned to that agency will be available.
- i.e. Modifying a group and selecting only agencies 54 and 160, would not allow you to assign it to a user in any other agencies.
- When selecting each agency, you’ll be prompted with a “Select Tabs” dialog allowing you to specify which tabs inside that particular agency the user will have access to.
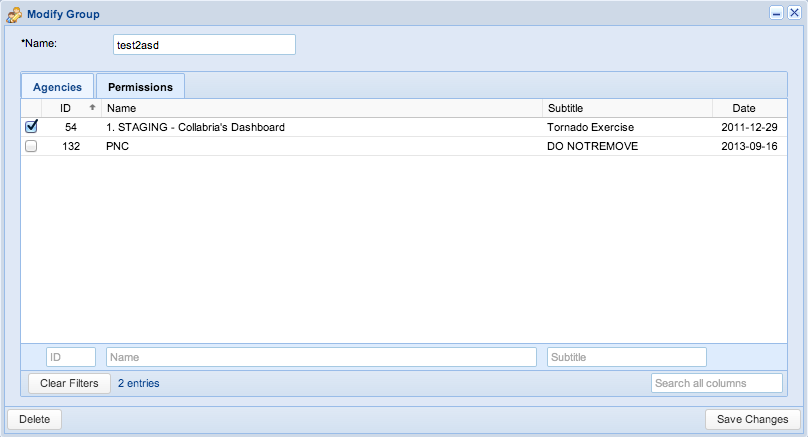
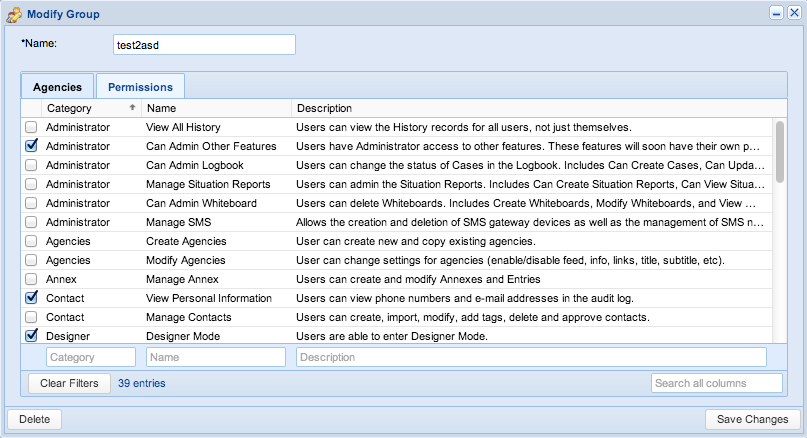
- In the “Permissions” tab, select (using the available checkboxes) which permissions users assigned to this group will be given.
- It is not possible to assign permissions to a group if your user profile does not have that permission. i.e. If you are a member of the “Agency Administrator” group, you do not have permission to “Create Agencies”; therefore, you wouldn’t be able to give someone else permission to do so.
- When you are finished configuring your group press “Save” to save your changes.
Annex
The Annex is a way of providing auxiliary information related to an agency that users can easily access.
Categories
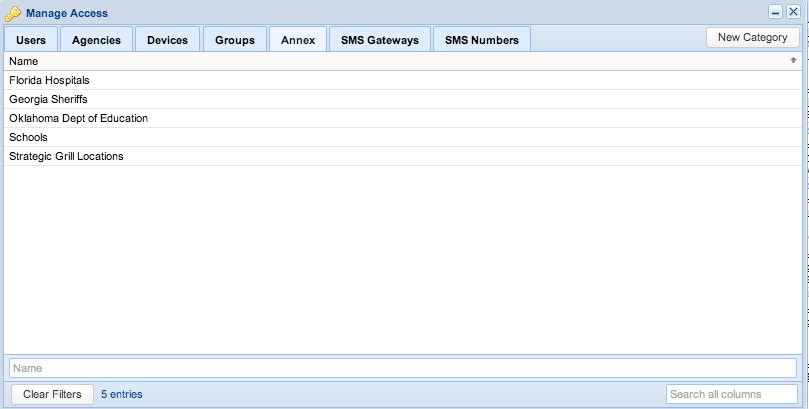
Annexes are divided into different user specified “Categories”, each category can have up to 10 user defined fields.
Creating a Category
Only users who have been granted permission to Manage Annex will have this option available. However, all users will be able to access the information provided by the Annex.
- Start by clicking the “Menu” button followed by “Access” in the top-right of the ReadyOp dashboard.
- Inside the Manage Access dialog, select the “Annex” tab.
- This tab may not be present if you have not been granted access to manage the annex.
- Continue by clicking the “New Category” button in the upper right corner of the dialog.
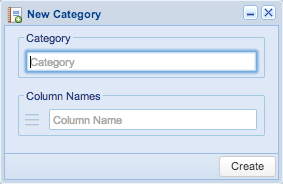
- In the “New Category” dialog, fill out the relevant information for the annex category you’re creating.
- Each category can have up to 10 user defined fields/columns and must have at minimum 4.
- Press “Create” to save the new category.
Deleting a Category
Only users who have been granted permission to Manage Annex will have this option available.
- Start by clicking the “Menu” button followed by “Access” in the top-right of the ReadyOp dashboard.
- Inside the Manage Access dialog, select the “Annex” tab.
- This tab may not be present if you have not been granted access to manage the annex.
- Continue by double clicking on the category you’d like to delete.
- Inside the “Modify Category” dialog, click the “Delete” in the bottom left corner.
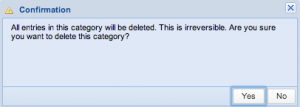
- You’ll be prompted with a warning notifying you that deleting a category is a permanent action, are you sure you’d like to continue.
- To continue deleting the category, press “Yes”, to cancel press “No”.
Modifying a Category
Only users who have been granted permission to Manage Annex will have this option available. However, all users will be able to access the information provided by the Annex.
- Start by clicking the “Menu” button followed by “Access” in the top-right of the ReadyOp dashboard.
- Inside the Manage Access dialog, select the “Annex” tab.
- This tab may not be present if you have not been granted access to manage the annex.
- Continue by double clicking the category you’d like to modify.
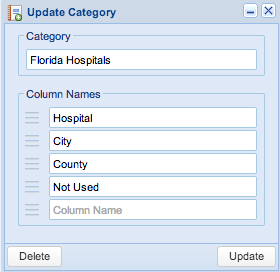
- In the “Modify Category” dialog, modify out the relevant information for the annex category as designed.
- Each category can have up to 10 user defined fields/columns and must have at minimum 4.
- Press “Save” to save your changes.
Entries
Entries are can be created and imported underneath each individual category.
Creating an Entry
Only users who have been granted permission to Manage Annex will have this option available. However, all users will be able to access the entries provided in the Annex.
- Start by right clicking in the empty white space on any of the standard dashboard tabs.
- Select the category for which you’d like to create a new entry.
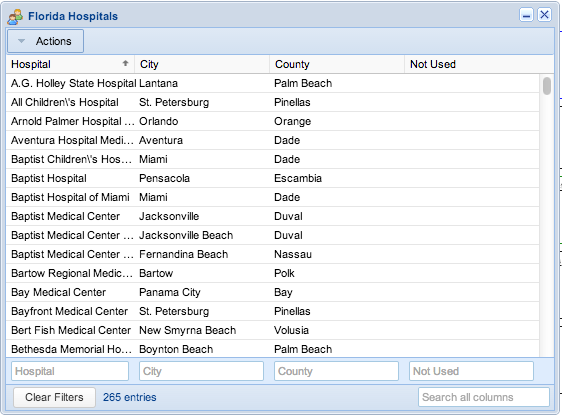
- Inside the entry list dialog for the category, click the “Actions” button in the upper left corner, followed by “New Entry”.
- In the “New Entry” dialog, enter the information for the entry you’d like to create.
- For more information on the available fields for this particular category see Creating a Category or Modifying a Category.
- Click “Create” to create your new entry.

Deleting an Entry
Only users who have been granted permission to Manage Annex will have this option available. However, all users will be able to access the entries provided in the Annex.
- Start by right clicking in the empty white space on any of the standard dashboard tabs.
- Select the category for which you’d like to delete the entry.
- Inside the entry list dialog for the category, double click the entry you’d like to delete.
- Inside the “Detail” dialog, click the “Delete” button in the bottom left corner.
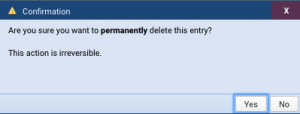
- You’ll be prompted with a confirmation dialog that deleting an entry is a permanent action, are you sure you’d like to continue.
- To continue deleting the entry, press “Yes”, to cancel press “No”.
Modifying an Entry
Only users who have been granted permission to Manage Annex will have this option available. However, all users will be able to access the entries provided in the Annex.
- Start by right clicking in the empty white space on any of the standard dashboard tabs.
- Select the category for which you’d like to modify the entry.
- Inside the entry list dialog for the category, double click the entry you’d like to modify.
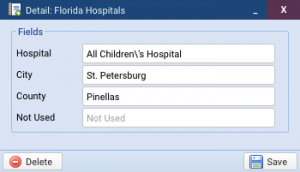
- In the “Detail” dialog, enter the information for the entry you’d like to modify.
- Click “Save” to save changes.
Phone Numbers
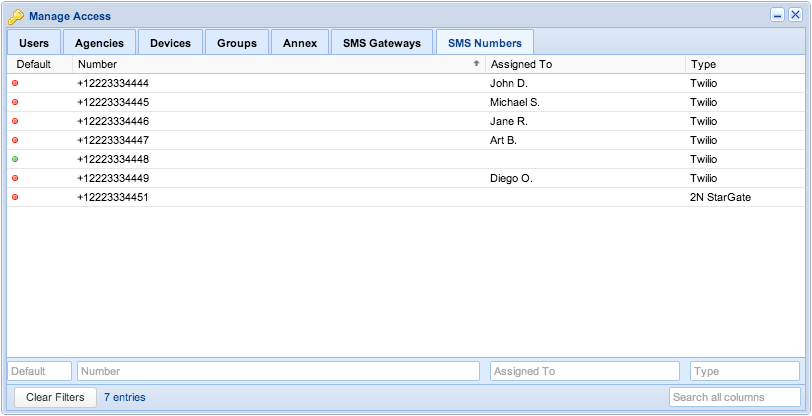
The Phone numbers appear automatically for users who have their own SMS gateways ( the gateways read the numbers from the sim cards and the software pulls all the information).
Creating a Phone Numbers
To assign a phone number to users within the ReadyOp system, please contact ReadyOp customer support for more information. In the case that your organization uses their own SMS gateway, you need to contact the Administrator within your agency.
-
Start by clicking the “Menu” button in the top- right of the ReadyOp dashboard.
- In the drop menu, select “Access” to bring up the manage access dialog.
- Inside the manage access dialog, you will see the Phone Numbers tab display at the top of the dialog.
- Press “Phone Numbers” and you will see a list of numbers and who they have been assigned to display.
- Click the “ New Number” button. An available numbers dialog will appear.
- Enter the area code and press “Search” to look for the available phone number in your area.
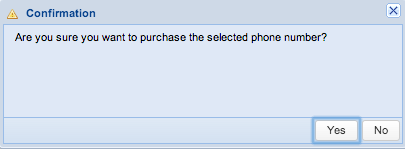
- Double click the number you’d like to purchase.
- You’ll be prompted with a confirmation dialog as seen in the screenshot below.
Deleting Phone Numbers
If your organization uses their own SMS gateways, you need to contact the Administrator within your agency. Otherwise, please contact a ReadyOp customer support for more information about deleting a phone number.
- Start by clicking the “Menu” button in the top-right of the ReadyOp dashboard.
- In the drop menu, select “Access” to bring up the manage access dialog.
- Inside the manage access dialog, you will see the Phone Numbers tab display at the top of the dialog.
- Press “Phone Numbers” and you will see a list of numbers and who they have been assigned to display.
- Inside the phone numbers double click the number you’d like to delete. A manage phone number dialog will appear.
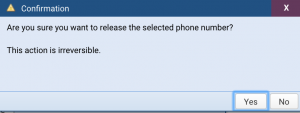
- Press the ” Release” button to delete the selected number.
- You’ll be prompted with a confirmation dialog as seen in the screenshot below.
SMS Gateways
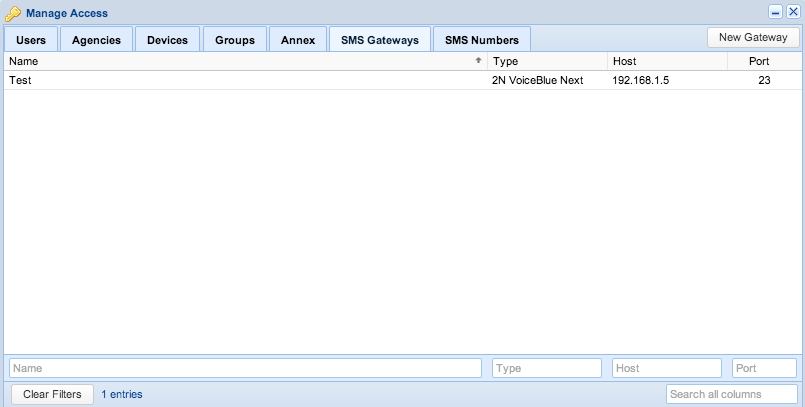
The SMS Gateway is a physical cellular network device used to facilitate sending and receiving SMS. They provide an interface for the ReadyOp dashboard to communicate with the cellular network.
Creating SMS Gateways
Depending on your permission level, you may or may not be able to create SMS gateways for your agency.
- Start by clicking the “Menu” button in the top-right of the ReadyOp dashboard.
- In the drop menu, select “Access” to bring up the manage access dialog.
- Inside the manage access dialog, you will see the SMS Gateways tab display at the top of the dialog.
- Press “SMS Gateways” and you will see a list of existing gateways display.
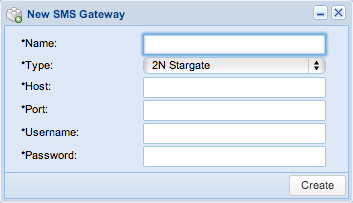
- Click the “ New Gateway” button. A new SMS gateway dialog will appear.
- Enter the information for the gateway and press “Create” to create the new SMS Gateway.
Deleting SMS Gateways
Depending on your permission level, you may or may not be able to delete SMS gateways for your agency.
- Start by clicking the “Menu” button in the top-right of the ReadyOp dashboard.
- In the drop menu, select “Access” to bring up the manage access dialog.
- Inside the manage access dialog, you will see the SMS Gateways tab display at the top of the dialog.
- Press “SMS Gateways” and you will see a list of existing gateways display.
- Double click the gateway you’d like to delete. A modify SMS gateway dialog will appear.
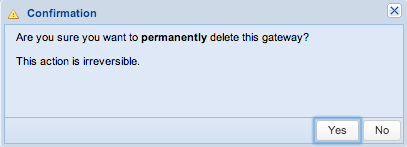
- Press the “Delete” button to permanently remove the gateway.
- You’ll be prompted with a confirmation dialog as seen in the screenshot below
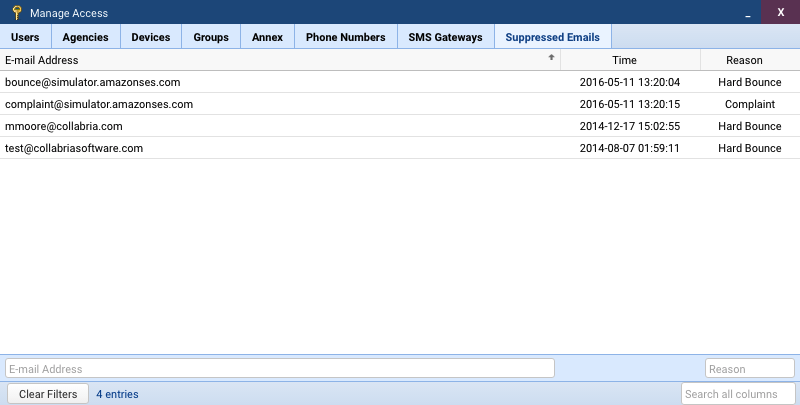
Suppressed Emails
This section contains a list of e-mail addresses that have unsubscribed or bounced. If a recipient of an e-mail from the ReadyOp system clicks the unsubscribe link in the footer of the email, they will be marked as having unsubscribed and any future e-mails sent to these addresses will appear as “Suppressed” in the e-mail history. On occasion you may need to remove a user from the unsubscribed list, if for example they accidentally unsubscribed themselves.
- This tab is only available for Agency Administrators to manage the suppression list.
Any recipient who meets the following criteria is added to the suppression list automatically:
- The recipient unsubscribed themselves using an unsubscribe link in an email.
- The recipient marked one of the emails as spam.
- An email sent to the recipient results in a hard bounce.
They are two different types of email bounces:
- Hard bounce
- Recipient email address does not exist.
- Domain name does not exist.
- Recipient email server has blocked delivery.
- Soft bounce
- Mailbox is full (over quota).
- Recipient email server is down or offline.
- Email message is too large.
Removing suppressed emails
Agency Administrators are granted permission to remove suppressed emails from the suppression list.
If you would like the recipient to start receiving emails from the system again.
- Start by clicking the “Menu” button in the top-right of the ReadyOp dashboard.
- In the drop menu, select “Access” to bring up the manage access dialog.
- Inside the manage access dialog, click the Suppressed Emails tab displayed at the top of the dialog.
- Double click the email address you’d like to remove from the suppression list. A Manage Suppressed Address dialog will appear.
- Press the “Remove” button to eliminate the email address from the list of suppressed emails.
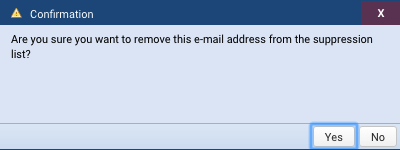
- You’ll be prompted with a confirmation dialog asking you if you would like to remove the email from the suppression list.
