Recording a New Alert
- Start by clicking the “Menu” button in the top-right corner of the ReadyOp dashboard.
- In the drop down menu, select “Alerts” to bring up the manage alerts dialog.
- Inside the manage alerts dialog, open the “Actions” menu and select “Record Alert”.
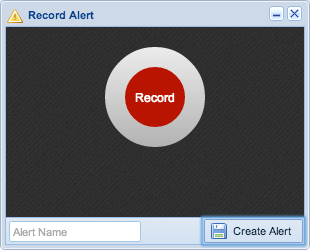
- A record new alert dialog will appear. To begin recording, press the red “Record” button in the center of the dialog. To end the recording, press the red “Stop” button.
- Alerts can be up to 30 seconds in length.
- You can playback as well as re-record your new alert as many times as you’d like before saving.
- When finished, give the alert an easily identifiable name and press “Create Alert”.
- Once an alert is created it cannot be re-recorded. It can, however, be renamed.
Renaming Existing Alerts
- Start by clicking the “Menu” button in the top-right corner of the ReadyOp dashboard.
- In the drop down menu, select “Alerts” to bring up the manage alerts dialog.
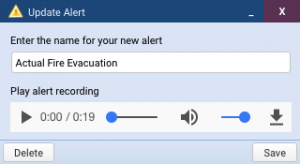
- Double click the alert you’d like to modify to bring up the “Update Alert” dialog.
- Not only can you re-name an alert, but you can use this same dialog to replay the alert as many times as you’d like.
- Here you can enter a new name for the existing alert.
- Changing the name on an alert will also change all History records that show the alert being sent, to reflect the new name.
- When you have finished renaming the Alert press “Save” to save the changes.
Importing Pre-Recorded Alerts
- Start by clicking the “Menu” button in the top-right corner of the ReadyOp dashboard.
- In the drop down menu, select “Alerts” to bring up the manage alerts dialog.
- Inside the manage alerts dialog, open the “Actions” menu and select “Import Alert”.
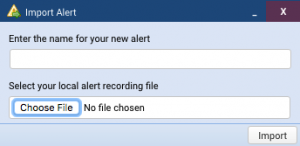
- In the Import Alert dialog, click “Choose File” to open the file selection menu.
- Select the file stored on your computer you’d like to use for the alert.
- Enter an identifiable name for the alert in the input field.
- When you’re ready to import the new alert, click the “Import” button.

Creating a new TTSA (Text to Speech Alert)
- Start by clicking the “Menu” button in the top-right corner of the ReadyOp dashboard.
- In the drop down menu, select “Alerts” to bring up the manage alerts dialog.
- Inside the manage alerts dialog, open the “Actions” menu and select “Text-to-Speech Alert”.
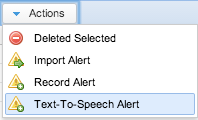
Screenshot: Menu – TTS Alert - In the New Text-to-Speech Alert dialog, start typing the message you would like to send.
- You can review your message before you send it. Click “Preview” to hear a preview of your alert.
- Enter an identifiable name for the alert in the input field.
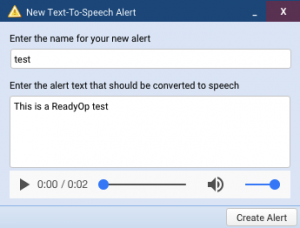
Screenshot: New TTS Alert
Deleting Alerts
- Start by clicking the “Menu” button in the top-right corner of the ReadyOp dashboard.
- In the drop down menu, select “Alerts” to bring up the manage alerts dialog.
- Double click the alert you’d like to delete to bring up the “Update Alert” dialog.
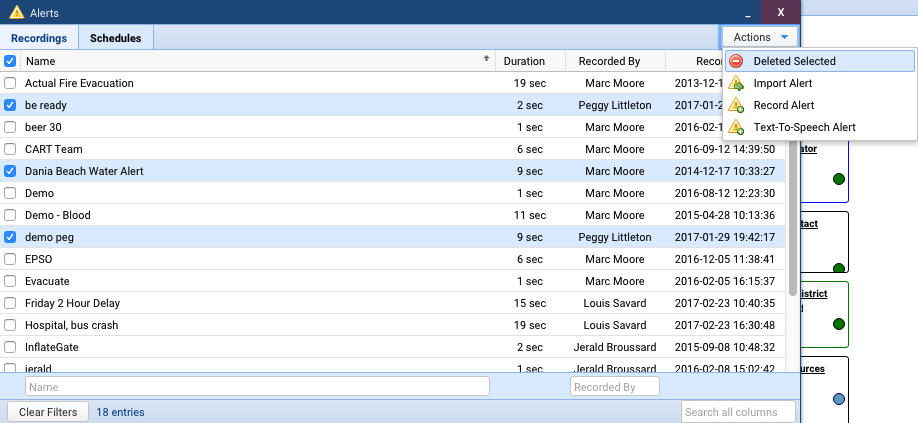
- You can also delete an alert by selecting one or more checkboxes in the alerts list and then pressing the “Actions” button followed by “Delete Selected”
- Here you’ll be able to delete the alert from the active alerts list.
- Deleted alerts will still appear in the history records if the alert was previously sent.
- Once you have chosen the alert you would like to delete. Press “Delete” to remove the alert.
- You’ll be prompted with a confirmation dialog asking if you’re sure you want to delete the alert.
Deleting Multiple Alerts
- Start by clicking the “Menu” button in the top right corner of the ReadyOp dashboard.
- In the drop down menu, select “Alerts” to bring up the manage alerts dialog.
- At this point, use the checkboxes to select the alerts you’d like to delete.
- When ready, open the “Actions” menu and choose the “Deleted Selected” option.
- Deleted alerts will still appear in the history records if the alert was previously sent.
- You’ll be prompted with a confirmation dialog before deleting the selected alerts.
Sending Alerts
Sending alerts requires an alert to have been pre-recorded. To learn how to create an alert before sending, visit the “Creating Alerts” section above.
- In order to send an alert you’ll need start by identifying the person(s) you’d like to send the alert to. These can be either person’s in an object, or person’s in the roster.
- Alerts can only be sent to contacts that currently exist in the roster.
Selecting contacts by object or object(s)
- Start by selecting one or more objects on the dashboard.
- This can be accomplished by dragging a box from outside the objects, around the objects you’d like to select.
- In addition, objects can be selected by holding the CTRL key (Windows), or the ⌘ Command key (Mac), and clicking in the whitespace of the objects you’d like to select.
- Once selected click on any of the contact icons inside the objects to open the communicate dialog.
Selecting contacts inside Objects (Agencies, Roles / Teams)
- Start by clicking on an object’s title to open the “Manage Object” dialog.
- Inside this dialog, on the “People” tab you’ll see all the people that belong to the given Agency/ Role / Team. Select the person(s) you’d like to contact by clicking the checkboxes next to their contact options.
- Once selected, click any of the contact icons to open the communicate dialog.
Selecting contacts through the Roster
- Open the “Roster” tab to begin selecting people from the roster.
- If you cannot find the roster tab, it’s possible the tab has been renamed or you do not have permission to access it, contact your Administrator for more information on how to find the Roster tab in your dashboard.
- Here you can search for persons based on the given contact fields, you can select people by clicking the checkboxes next to their contact option icons.
- Once selected, click any of the contact icons to open the communicate dialog.
Sending the Alert
- After you’ve selected the person(s) you’d like to contact and have the communicate dialog open. Select the “Alert” option from the communication type picker in the communicate dialog.
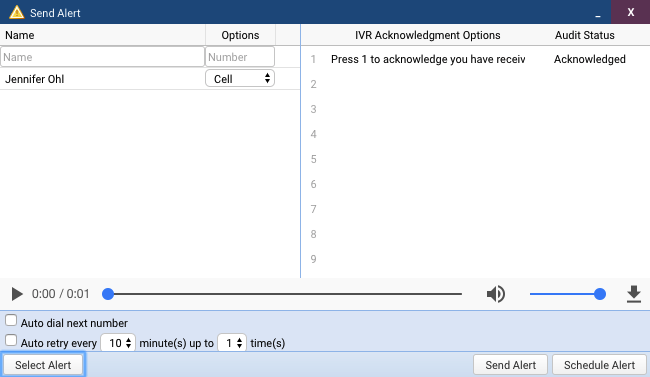
- After selecting the “Alert” option in the communication type picker and pressing “Continue” you’ll be prompted with the “Send Alert” dialog.
- Inside this new dialog it’s possible to continue adding more contacts to send the alert. You can click drag contacts in the following locations into this dialog;
- The Search -> Tasks/Assets dialog.
- From inside a “Manage Object” dialog.
- You can drag objects themselves to add their occupants to the list.
- From the roster.
- Inside this new dialog it’s possible to continue adding more contacts to send the alert. You can click drag contacts in the following locations into this dialog;
- At this point it is necessary to select an alert you’d like to send. Continue by clicking the “Select Alert” button and pressing “Continue”.
- You’ll be able to play it back before sending the alert. This can be done right within the “Send Alert” dialog.
- Once you’ve selected the alert you’d like to send, you’ll have two more options to choose from.
- Auto dial next number
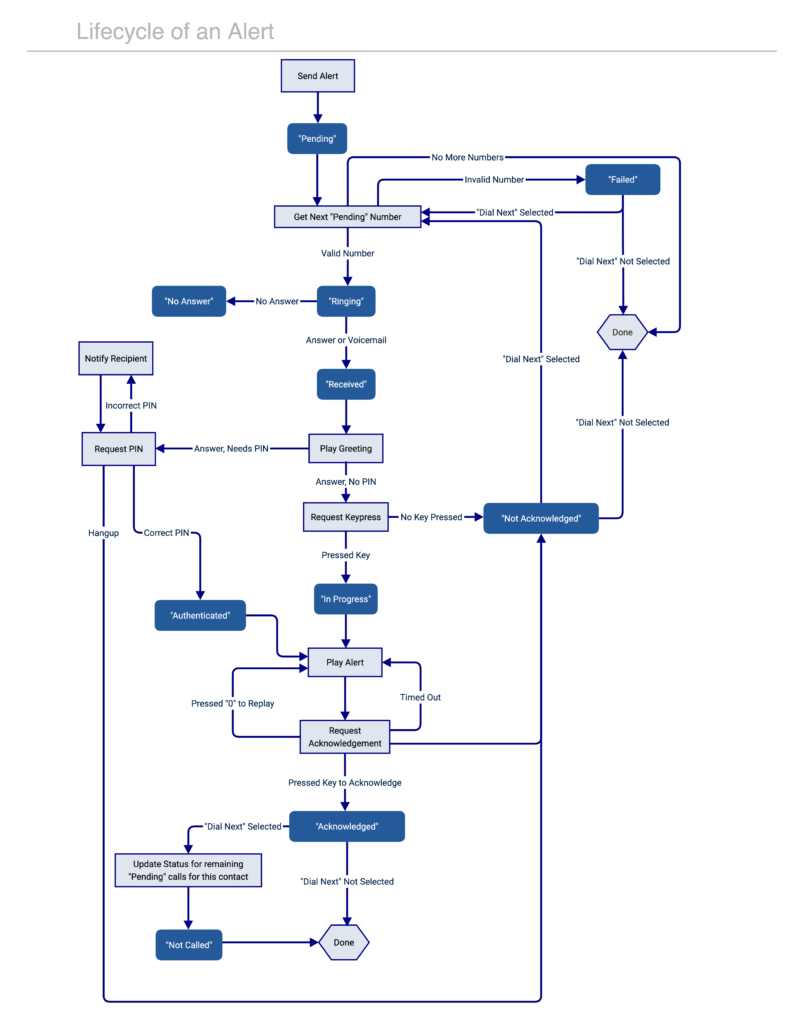
- When selected, the system will automatically dial each of the recipients numbers, once, in order until positive acknowledgement is received.
- Auto delayed retry
- When selected, the system will automatically dial each recipient a second time every (1-10 minutes). You will have to pick the number of times(1-9) the alert will be sent to the recipient after they did not acknowledge the alert the first time.
- Auto dial next number
- When you’re ready to send the alert, click the “Send Alert” button in the bottom right corner, and each recipient will be called automatically.
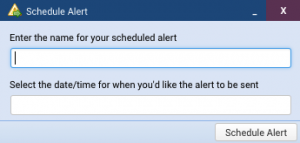
- Additionally if you’d like the alert to be sent automatically in the future, you can select the “Schedule Alert” button, a schedule alert dialog will display. Enter a name for your scheduled alert and select the date and time you’d like the alert to be delivered. Press the “Schedule Alert” button to send the alert.
