In ReadyOp, contacts are managed through the Roster. Contacts are people with whom you can communicate. There is no limit to the number of contacts you can have in a Roster. We recommend managing contact information with tags, titles and other information to make finding contacts much easier.
Viewing Contacts
Viewing Contacts is as simple as opening the Roster tab. To view details for a specific Contact, double click on the Contact’s name in the list. Depending on your permission level, you may or may not be able to view/edit this information.
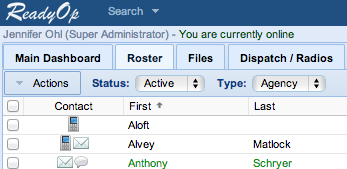
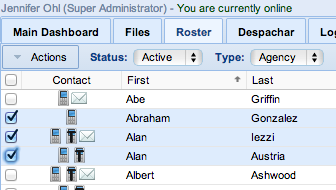
Contacts can be assigned various information such as their Title/Job Duty, Organization, and Tags. All of this information is searchable through the Roster. Online users will have their name and information highlighted in green, as seen in the following screenshot.
Adding Tags
Tags are a very useful added information designed to make searching for Contacts easier. Examples of tags could include “Hazmat”, “K9”, “Neurosurgeon”, etc. In some cases it may necessary to add a specific tag to Contacts to many people.
- Start by opening the “Roster” tab in the ReadyOp dashboard.
- This tab may have been re-named, or you may not have permission to access this tab. Please contact your system administrator for more information on locating the Roster.
- Select one or more contacts in your roster by marking the checkboxes in the first column next to the roster entries.
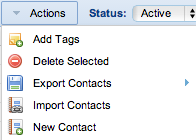
- Click the “Actions” button in the upper left corner, followed by the “Add Tags” link to bring up the new contact dialog.
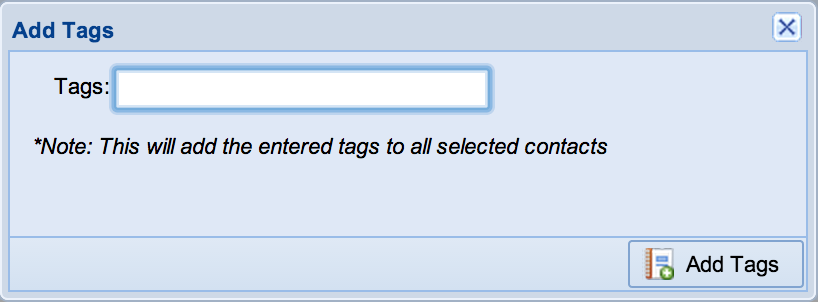
- Enter the new tag or tags you’d like to have added to the selected contact(s) and press “Add Tags”.
- When adding tags, it’s recommended to use a comma “,” as a separator. i.e. To add the tags “Doctor” and “Pediatrician”, type “Doctor, Pediatrician”.
Creating Contacts
When creating a contact, it’s possible to create a contact that is visible to only your user, and if you have permission, you can create contact’s that are visible to all users throughout the given agency.
- Start by opening the “Roster” tab in the ReadyOp dashboard.
- This tab may have been re-named, or you may not have permission to access this tab. Please contact your system administrator for more information on locating the Roster.
- Click the “Actions” button in the upper left corner, followed by the “New Contact” link to bring up the new contact dialog.
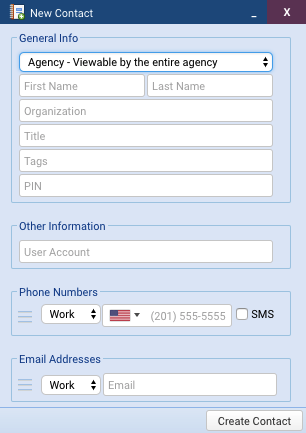
- Inside the new contact dialog. Enter the information about the contact.
- Each contact can have up to 5 e-mail address and phone numbers.
- In order to send SMS messages to a phone number, that number must have the “Textable” option checked.
- In order to communicate with other ReadyOp Dashboard users, the contact must be linked to an existing user account.
- Specify a PIN number if you’d like to require the contact to enter a PIN number when receiving an alert before they are able to hear the message.
- Press “Create Contact” when you’re ready to save the new contact.
Deleting Contacts
There are two different ways to delete a contact, one at a time, and multiple.
Deleting Multiple Contacts
- Start by opening the “Roster” tab in the ReadyOp dashboard.
- This tab may have been re-named, or you may not have permission to access this tab. Please contact your system administrator for more information on locating the Roster.
- In the list of contacts, select the contact(s) you’d like to delete by marking the checkboxes in the first column next to the roster entries.
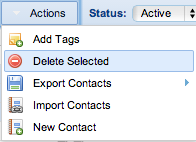
- Click the “Actions” button in the upper left corner followed by the “Delete Selected” option to delete the contact(s).
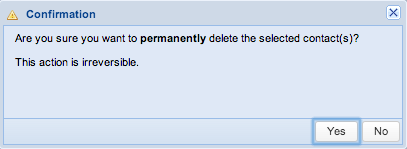
- After selecting the delete option. A Confirmation popup box will appear prompting you to confirm that you’d like to permanently delete the selected contacts.
Deleting a Single Contact
- Start by opening the “Roster” tab in the ReadyOp dashboard.
- This tab may have been re-named, or you may not have permission to access this tab. Please contact your system administrator for more information on locating the Roster.
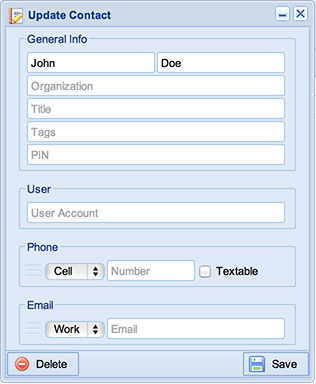
- In the list of contacts, double click the contact you’d like to delete to bring up the manage contact dialog.
- Inside the manage contact dialog. Press the “Delete” button to continue.
- After selecting the delete option. A Confirmation popup box will appear prompting you to confirm that you’d like to permanently delete the selected contact.
Exporting Contacts
Contacts can be exported from the ReadyOp Dashboard in XLXS format (Microsoft Excel 2007).
Exporting All Contacts
- Start by opening the “Roster” tab in the ReadyOp dashboard.
- This tab may have been re-named, or you may not have permission to access this tab. Please contact your system administrator for more information on locating the Roster.
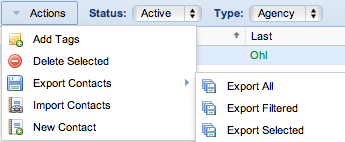
- Click the “Actions” button in the upper left corner followed by the “Export Contacts”.
- Contacts can then be exported by selecting either “Export All”, as well as “Export Filtered” or “Export Selected”.
- The Export Filtered option will appear when you’ve searched to filter the roster by one or more of its fields.
- The Export Selected option will appear if you’ve specifically selected one or more roster entries.
- Contacts are exported into the same file format in which they can be imported.
- The exported list will also contain a column of Contact ID numbers, these numbers are used to reference existing contacts so that an import of a changed roster spreadsheet can be used to update existing roster entries.
Importing Contacts
Contacts can be imported from XLS, XLXS or CSV to create new contacts or update existing contacts. When importing a list of contacts, the order of column’s is not important, as long as the column names in the header row are spelled correctly.
- Start by opening the “Roster” tab in the ReadyOp dashboard.
- This tab may have been re-named, or you may not have permission to access this tab. Please contact your system administrator for more information on locating the Roster.
- Click the “Actions” button in the upper left corner followed by the “Import Contacts” option.
- Choose the file stored in your computer with the contacts information.
- To obtain a copy of the file format for importing contact’s, see “Exporting Contacts”.
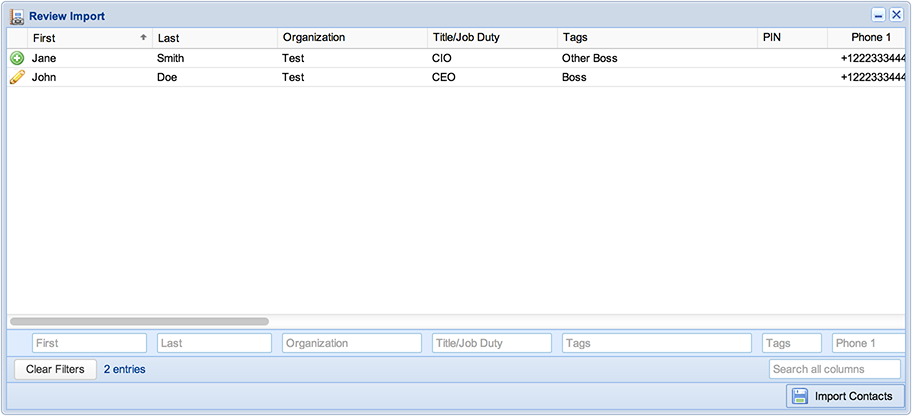
- Before you’re finished importing the contacts, you’ll be prompted with a review dialog displaying all the contacts to be added/modified.
- Contact’s that were exported and re-imported will be automatically matched based on their Contact ID, and updated.
- If a contact in the import list doesn’t have a Contact ID specified, or the Contact ID doesn’t exist, it’l be created as a new entry
Request Contact Update
An Update Request is a great way to get a quick update from people who are included in the Roster.
- Update requests can be sent to any valid email address in the Roster.
- When you send an update request, the recipient will receive an email with a link that they can click to edit specific data without signing in to ReadyOp.
Requesting Contact(s) Update
- Start by opening the “Roster” tab in the ReadyOp dashboard.
- This tab may have been re-named, or you may not have permission to access this tab. Please contact your system administrator for more information on locating the Roster.
- Select the contact(s) you would like to send the request.
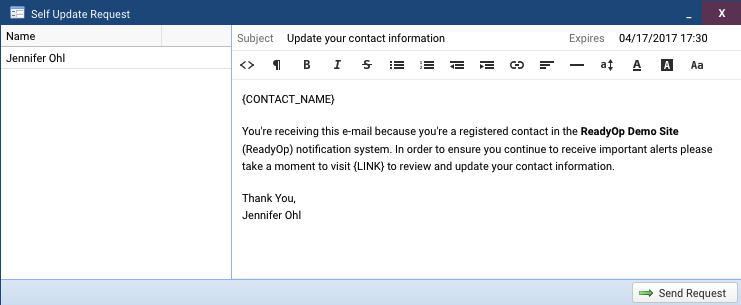
- Click the “Actions” button in the upper left corner followed by “Request Update” to bring up the self request dialog.
- At this point you can drag and drop more people into the dialog before sending the request.
- Press “Send Request” when you are ready to send the request.
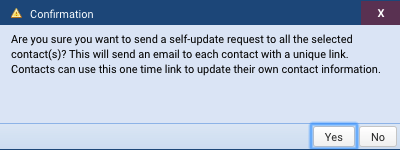
- You’ll be prompted with a confirmation dialog. Press “Yes” if you would like to send the request or “No” to cancel it.
Additional Roster Columns
If you have been granted Agency Administrator rights, you are enable to add up to 10 custom columns to your Roster to have more information on each contact, i.e. employee numbers, address, city, State, Zip Code, Contributor amount, training completed, special skills, etc.
- Start by clicking the “Menu” button followed by “Access” in the top-right of the ReadyOp dashboard.
- Inside the Manage Access dialog, select the “Agencies” tab.
- This tab may not be present if you have not been granted access to manage agencies.
- Continue by double clicking on your agency. A Modify Agency dialog will display with all the additional columns you can add to the right of the box.
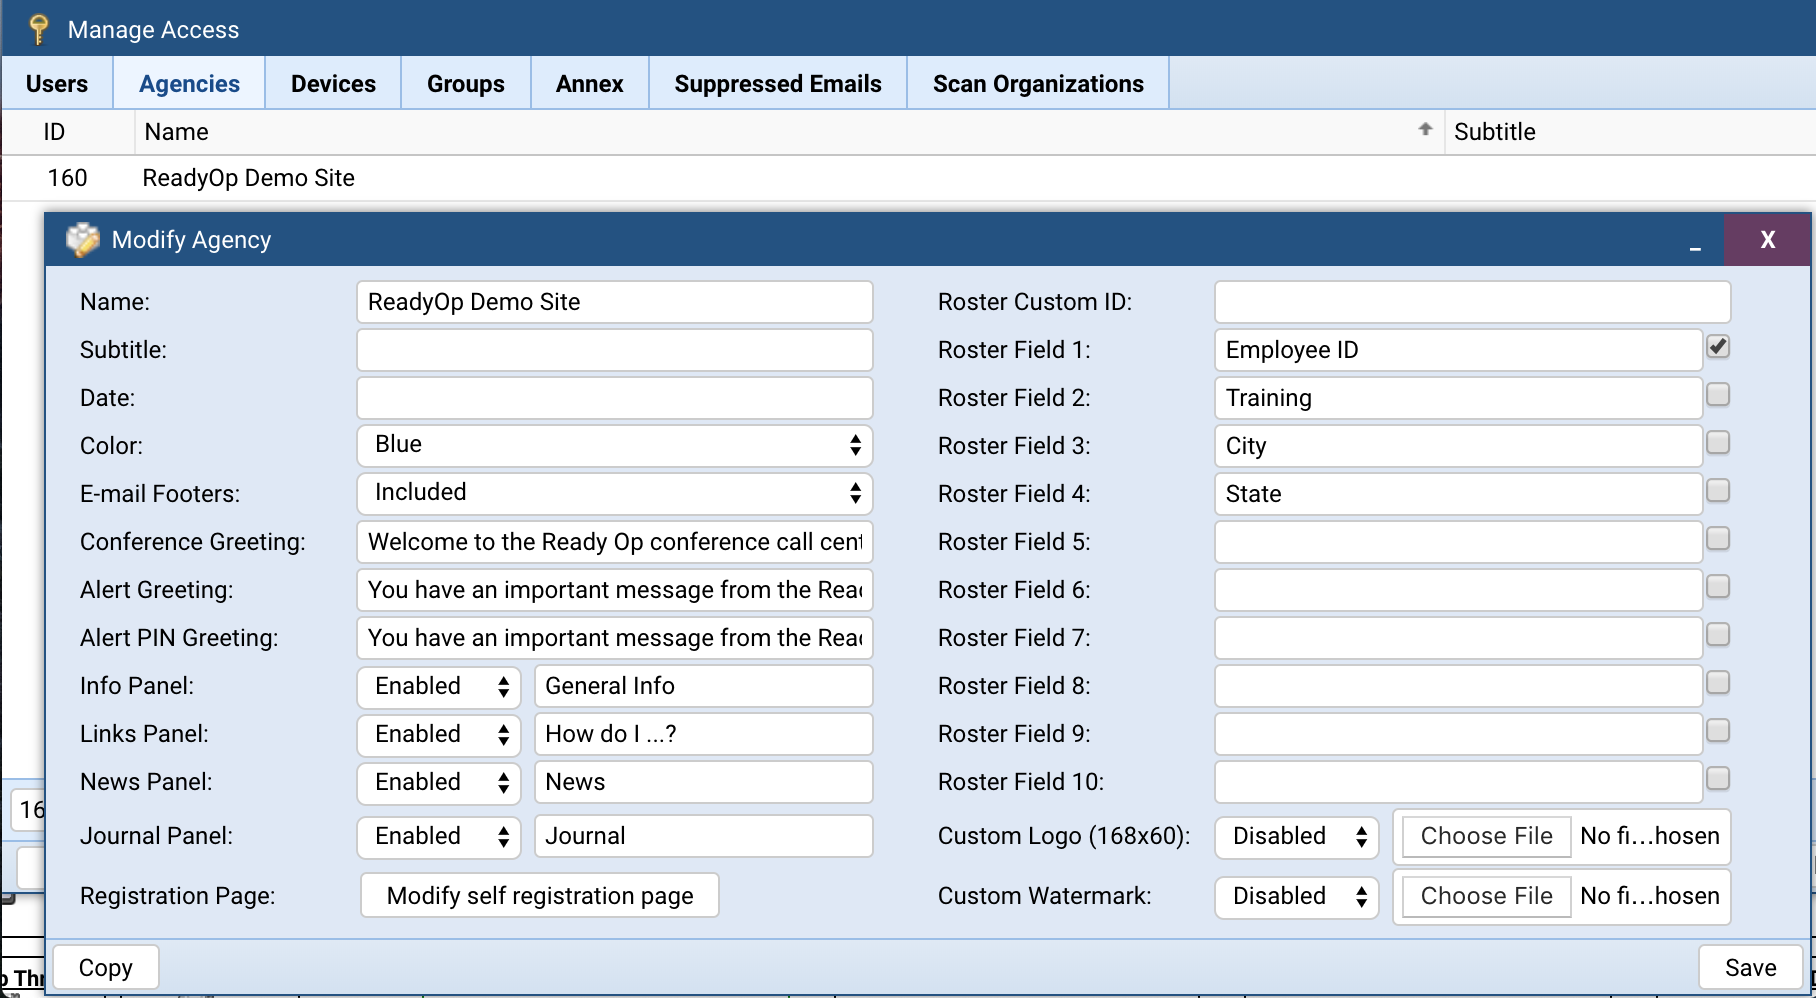
- Note: All the columns will appear in the order they were entered. If changes are made at later date and a column is changed, the prior information for this column for each individual will also be deleted.
- After you have entered the new Roster field name. Press “Save” and the new column headers will be added to the Roster.
- The data in the custom columns will be importable, exportable as well as sortable and searchable in the same way as the built in roster data fields.
