Sending emails
To start sending emails to other users;
- Start by selecting the person or persons you’d like to communicate with.
- People can be selected from several different sources, whether it be in the roster, inside an object/role/team on one of the Dashboard’s tabs, or even through the search feature.
- Continue by clicking the email icon.

- A communicate dialog will appear allowing you to continue adding people before you continue to send it.
- At this point it’s possible to drag and drop more people into the email before you begin.
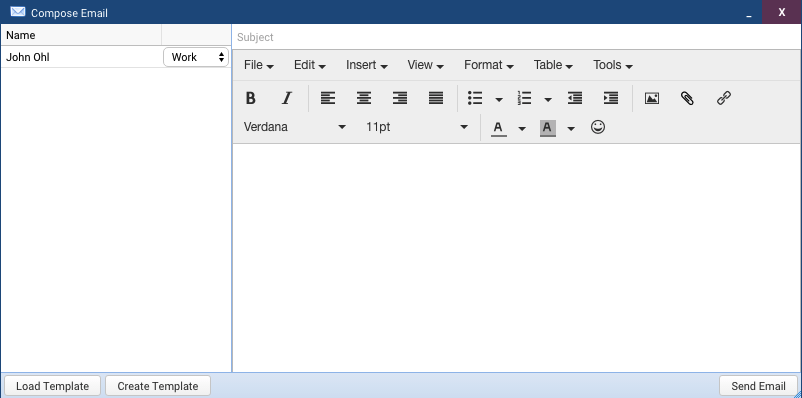
- To start sending your email, press the “Continue” button in the bottom right-corner of the Communicate dialog. A compose email dialog will appear.
- At the top of the email compose you can specify the e-mail subject.
- In order to ensure the email won’t be sent to a spam or junk folder, the email subject cannot be less than 16 characters, or longer than 255 characters, and must contain at least three words.
- Below the subject input box is the e-mail body editor where you can customize the body of the e-mail sent to your recipients . You’ll find different options to edit/modify your compose email.
- To insert/edit image (such as a logo)
- Start by clicking on the insert/edit image icon
 in the email editor toolbar.
 - A insert/edit image window will display. To upload an image click on upload image icon
 next to the source box.
 - Select the image you would like to upload from your computer. When you are done uploading the image press “Ok” to continue.
- Start by clicking on the insert/edit image icon
- To attach one or more files
- Start by clicking on the attach file(s) icon
 in the email editor toolbar.
 - Select the file(s) you would like to attach to your email. When you are done uploading the file(s) press “Ok” to continue.
- You’ll find the attach file(s) uploaded at the bottom of the compose email dialog. If you would like to remove the file(s) click on “Remove” to remove it.
- Start by clicking on the attach file(s) icon
- To insert a link
-
To make the font larger
-
Start by clicking on font size and increase to 12pt.
-
If you would like to increase font size before sending (larger than the 8pt by default), and you have already typed or copy/pasted the body of the email. Highlight the entire body of the email to increase/decrease font size.
-
-
To personalize the email (it will include a first or last name before the body of the text)
-
Type the following for first and last name: Dear {CONTACT_NAME},
-
- To insert/edit image (such as a logo)
- You can type what you’d like to send to the other participants in the e-mail editor/body area.Emails are stored in the history for later reference

Screenshot: Compose Email Dialog - To create a template
- After using the email editor to compose your email. Press “Create template” to save the body as a new template.
- To load a template
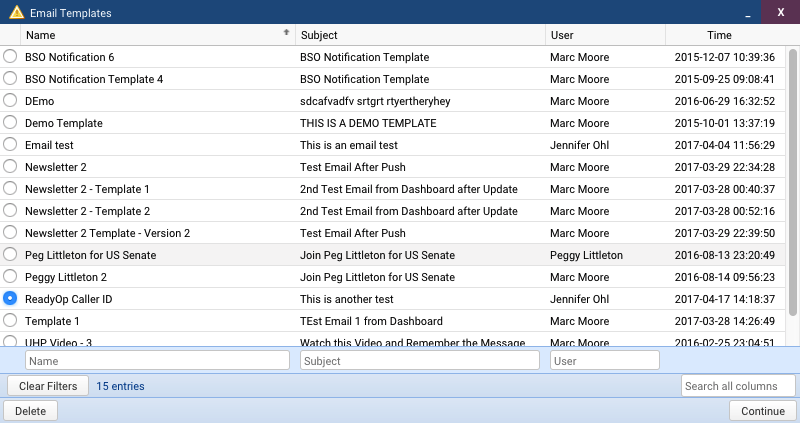
- When you are at the point where you have added all the people you would like to send the message. Press “Load Template” to show the list of templates available.
- Select the template you would like to send and press “Continue.
- Press “Send E-mail” to send the selected template.

Screenshot: List of Templates
- To create a template
Receiving Replies
Replies to e-mails sent from ReadyOp are sent directly to the e-mail address configured in your user profile. For information on configuring this e-mail address see User Profile.

