Creating Objects
Before you can begin creating objects you’ll need to enter Designer Mode.
- Select the Menu button in the upper right corner of the dashboard’s toolbar to open the drop down menu. Choose the Designer Mode option.
- Once in Designer Mode, select the Menu button again in the upper right corner of the dashboard’s toolbar.
- The drop down menu will appear. This time, choose “New Object”.
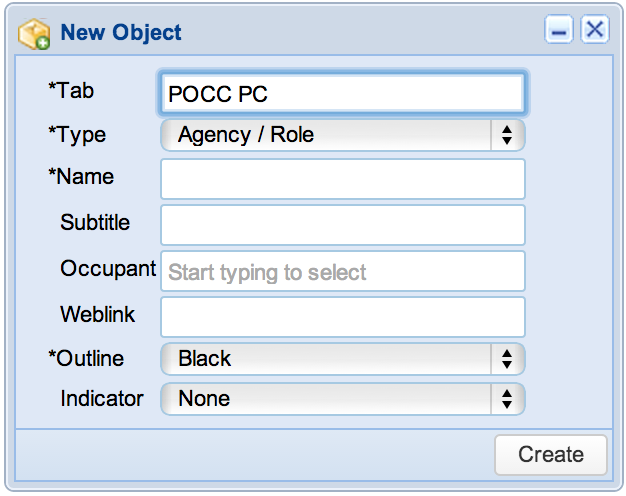
- A New Object popup dialog will appear in the center of the screen.
- Fill in the desired information, at this point you are able to specify the new object’s information, including but not limited to the following;
- Type
- Specified (Agency/Role, Camera, Team)
- Tab
- Which Tab the new object will appear on.
- Name
- The name that will identify the new object.
- Subtitle
- The name that will be displayed below the object’s name.
- Occupant
- The person that will be identified as the primary point of contact for the new object.
- Weblink
- A website address
- Type
- Press “Create” when you are finished to create your new object.
- Objects cannot be created on every type of tab. Some special built-in tabs such as the Roster, Logbook, Tracking, Forms, Dispatch, Files, etc cannot have objects in them.

Moving Objects
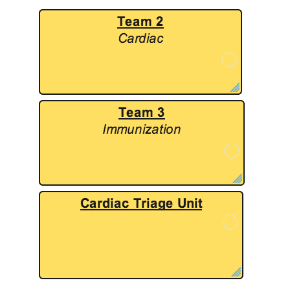
- When in designer mode it’s possible to move an object or objects by clicking in the object and dragging the object around on the canvas. You can also select multiple objects by clicking and dragging on the canvas, or holding the CTRL key or Command key and clicking on multiple objects.
Resizing Objects
- To resize objects, you follow the same procedures as you would to move an object, however, instead of clicking in the object click on the object’s border, click and hold down while dragging on the bottom right corner of one of the selected objects.

